

Valor VL500 Quick Reference Guide
Posted: January 30, 2023 | Updated:
Discover the features of the Valor VL500, which seamlessly combines the capabilities of an Android tablet with a point of sale (POS) system, all neatly packed in a stylish and compact design. With its 5.5″ HD color touchscreen and built in 2MP camera featuring LED flash technology the VL500 offers versatility to meet your business requirements.
Specially designed to enhance user experience in any setting the VL500 incorporates a printer and a high-capacity battery, for operations throughout the day. Simplify your checkout process with its 3G, 4G LTE, Bluetooth Wi Fi connectivity options. Additionally, it comes equipped with rear cameras, microphone, fingerprint reader, barcode reader stylus pen and base.
Beyond being a terminal the VL500 sets itself apart as an industry leader by providing powerful processing capabilities that allow Valor to develop customized applications tailored to boost your business efficiency and success. Elevate your payment experience, with Valor PayTech VL500 where innovation meets performance.
Key Features of Valor VL500
- Better and improved 5.5″ Touchscreen
- Secure and safe android platform
- Comprehensive information for all transactions on the display
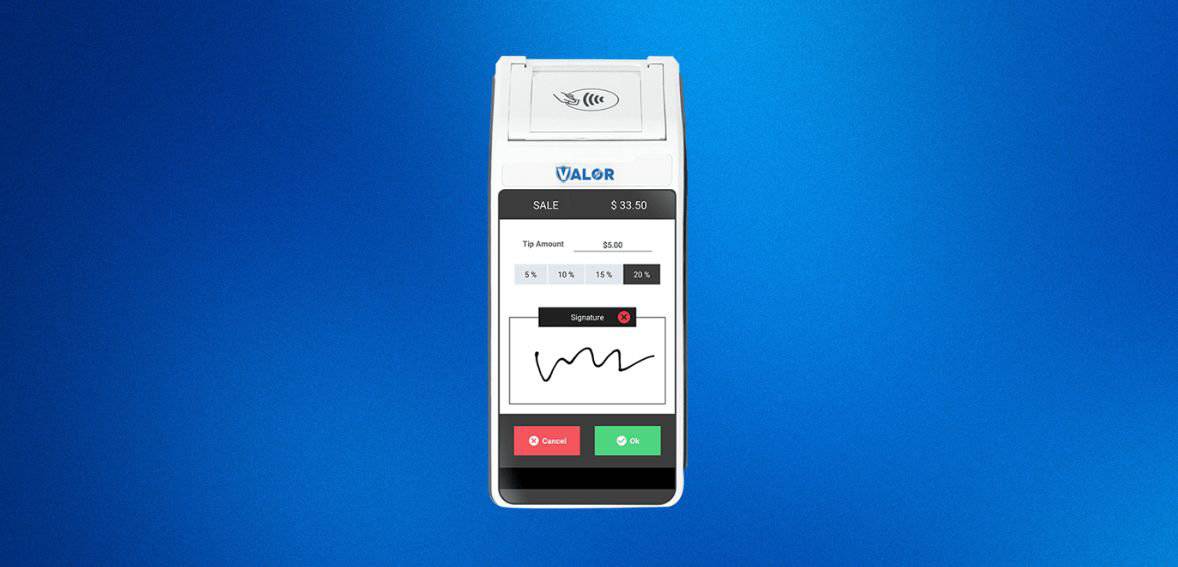
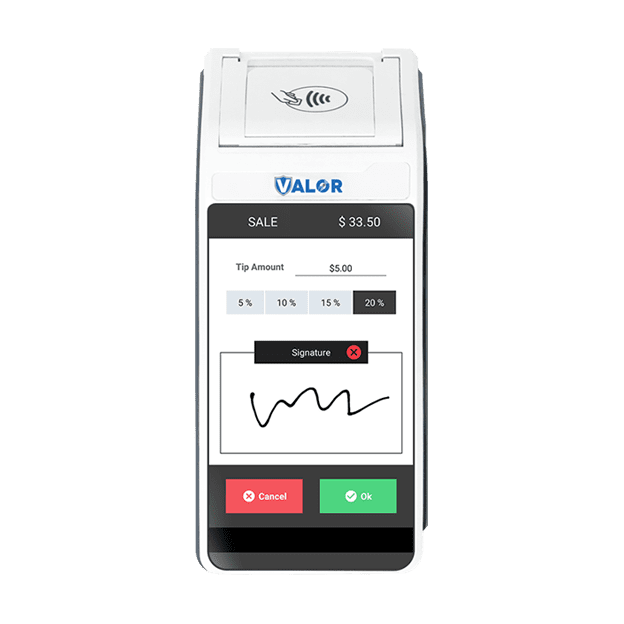
- Capture the signatures and pay on table facility
- Paperless receipt and signature feature
- Contactless bill and payment splitting
- Cash discounting, tipping, and surcharge on the tip options
- 4G/GPRS and high speed Wi-Fi Connectivity
- Automatic connection and failback procedure
How To Run a Transaction on a Valor VL500
How to Run a Credit Sale on a Valor VL500
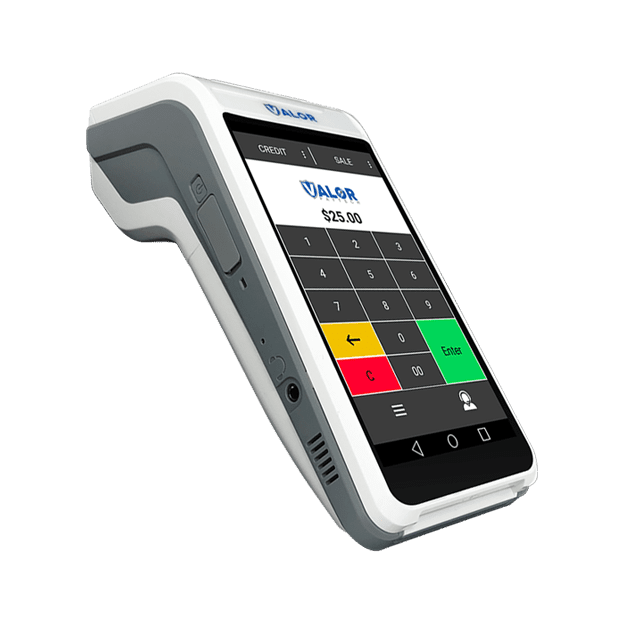
1. Enter the Transaction Amount and tap Enter.
2. Tap YES on the confirmation screen (you can remove the Non-Cash fee by tapping Remove Fee Icon).
3. Swipe / Insert / Tap card on display. For Manual Key Entry, select the Enter Manually option and enter the card number.
4. Enter tip amount, if enabled.
5. Enter the customer’s phone number for SMS receipt and select the Go Green option.
6. Select Print Receipt on the Valor VL500 if a paper receipt is requested.
7. Follow the prompts on screen for the customer copy.
How To Run a Debit Sale on a Valor VL500
1. Tap CREDIT until DEBIT is displayed.
2. Punch in transaction amount and tap Enter.
3. Tap YES on the confirmation screen (you can remove the Non-Cash fee by pressing Remove Fee Icon).
4. Swipe / Insert / Tap card on display. For Manual Key Entry, select the Enter Manually option and enter the card number.
5. Enter the customer’s phone number for SMS receipt and select the Go Green option.
6. Select Print Receipt on the Valor VL500 if a paper receipt is requested.
7. Follow the prompts on screen for the customer copy.
Understanding A Credit Refund on Valor VL500
Processing a refund in Valor VL500 involves reimbursing a credit card payment at the point of sale when customers return purchased products or when cashiers need to rectify input errors. Typically, these refunds must match the exact amount of the original transaction.
Issuing a refund with Valor VL500 is a straightforward process, but the steps may vary slightly depending on the card used in the transaction.
How To Run a Refund on a Valor VL500
How To Run a Credit Refund on a Valor VL500
1. Tap SALE until REFUND is displayed.
2. Enter the transaction amount and tap Enter.
3. Tap YES on the confirmation screen.
4. Swipe / Insert / Tap card on display.
5. Sign on the screen and tap the OK button.
6. Enter the customer’s phone number for SMS receipt and select the Go Green option.
7. Select Print Receipt on the Valor VL500 if a paper receipt is requested.
8. Follow the prompts on screen for the customer copy.
Understanding Credit Void on Valor VL500
A void transaction occurs when a merchant or vendor cancels a transaction before it is completed through a consumer’s debit or credit card account.
When a transaction is voided, it doesn’t appear as void on the customer’s account statement. Instead, it typically shows up as a pending transaction when the customer checks their account online. This is distinct from refunds, which are issued after the transaction has cleared through the customer’s account. Processing a void transaction is a straightforward procedure with Valor VL500.
How To Void a Transaction on a Valor VL500
How To Run a Credit Void on a Valor VL500
1. Tap SALE until VOID shows.
2. Enter the transaction number from receipt or the last 4 of the Credit Card number and hit Enter.
3. For password enter last 4 digits of EPI.
4. Tap on the transaction that needs to be Voided.
5. Enter the customer’s phone number for SMS receipt and select the Go Green option.
6. Select Print Receipt on the Valor VL500 if a paper receipt is requested.
7. Follow the prompts on screen for the customer copy
Understanding The Current Batch on Valor VL500
When a customer makes a purchase using their credit or debit card, the payment gateway provides the merchant with an authorization code. These codes are stored by the point of sale software, terminal, or gateway in a file. The merchant then sends this file containing the transaction information to the credit card processing company. This process of sending the file is known as batch processing. Many vendors opt to perform batch processing once a day, although the frequency can vary.
Valor VL500 also utilizes batch processing. Sending all transactions and authorization codes in one file to the processing company is more convenient than doing so after each transaction. Additionally, closing a batch incurs a fee from the processor, making this method more cost-efficient.
How To Settle Your Current Batch on a Valor VL500
How To Settle Your Batch on a Valor VL500
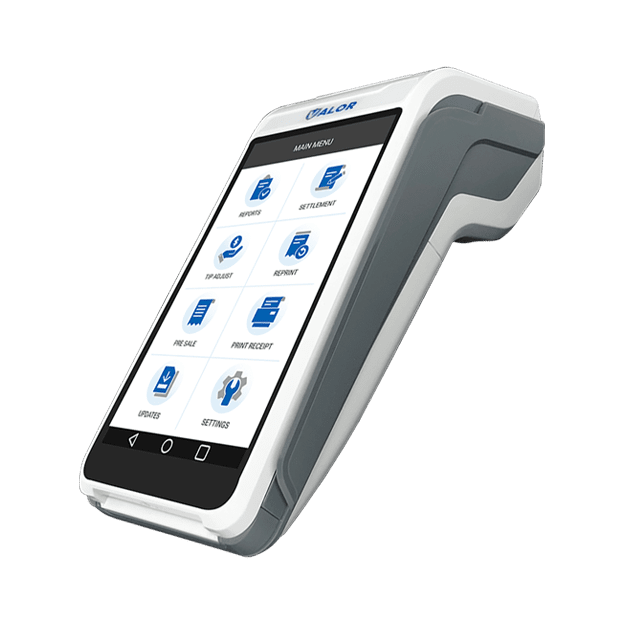
1. Tap the triple lines at the bottom left of the terminal.
2. Tap Settlement.
3. Enter the password which is the last 4 digits of your EPI number.
4. The settlement summary report will be printed.
5. The settlement summary report will be printed. The terminal prompt for a detailed report – select Yes or No.
6. A confirmation prompt for settling the batch will be displayed. Tap Yes to settle the batch.
Understanding The Tip Adjustment on Valor VL500
Tip Adjust functionality in your Valor System provides a familiar tipping process for US-based restaurants, following the traditional receipt-based workflow for both magstripe and EMV transactions.
To use Tip Adjust, the waiter can initiate the process by relocating the transaction, typically by entering a POS-provided invoice number found on the payment receipt. After that, they can specify the Tip Amount as written down by the guest. This feature maintains the customary tipping procedure, ensuring a smooth experience for both staff and customers.
How To Adjust Tips on a Valor VL500
1. Tap the triple lines at the bottom left of the terminal.
2. Tap Tip Adjust.
3. Enter the transaction number or last 4 digits of the card number to find the transaction you would like to tip adjust.
4. Confirm the transaction details by tapping the Confirm button.
5. Either select one of the predefined tip percentages or enter in a tip manually.
6. Press the Enter button to confirm.
7. Choose the option to print merchant copy.
8. Select Yes if you want to perform more tip adjusts.